
I recently saw a tweet mentioning the use of an AD account with the password in the description attribute and logon hours set to none. I can’t find that tweet anymore so I apologize for the lack of attribution.
The idea is that when someone does breach your network perimeter, some of the first steps in performing recon is collecting information from Active Directory. In this recon, they stumble on a DA account called ‘helpdeskDA’. They even discover a password in the description! Well this looks like an easy win and a critical finding. In order to figure out how to leverage this new found user, the attacker attempts to RDP or use psexec to move to a higher value target. In doing so, AD checks the credentials and returns to the attacker that his newfound account is not allowed to login during this time. Meanwhile, this login attempt has triggered an alert and is being investigated.
I personally love security tools that aren’t just blinky lights and can run natively on devices we already possess. I took a stab at setting this up in my test environment
Setting up the AD Account:
- Create your new account in AD Users and Groups and add to the Domain Administrators group.
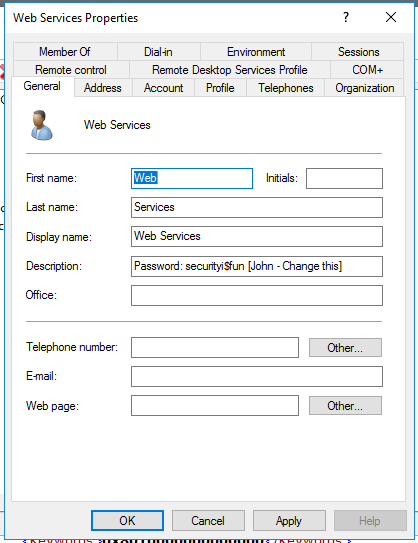
- Set the user description to something believable or just set the password in there and let the attacker make their own assumptions.
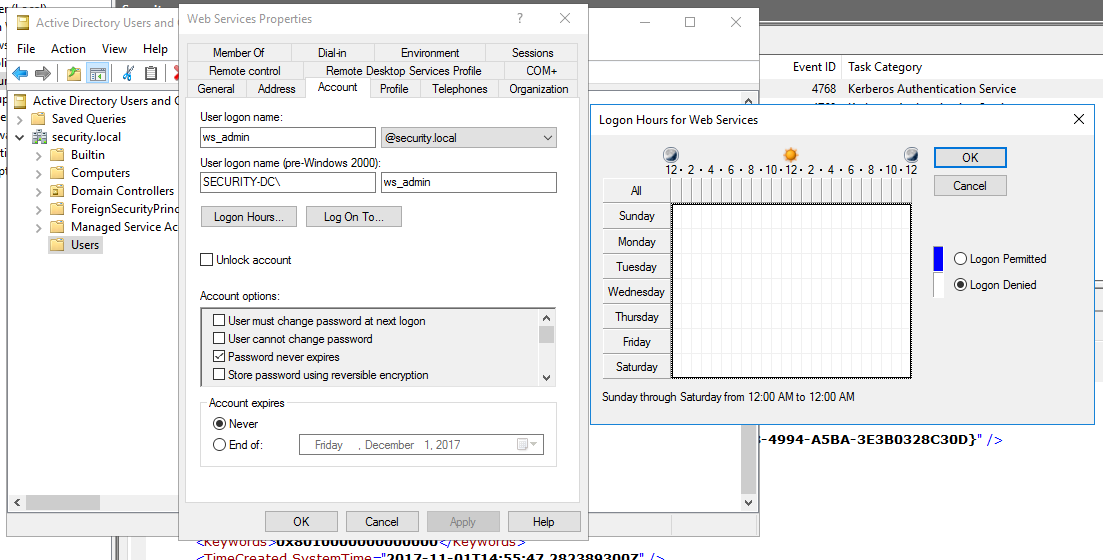
- Go to the Account tab and select Logon Hours…
- Set Logon Denied to 24/7
Group Policy:
There are a couple Group Policy options that need to be enabled in order for this to work. Depending on your organization, these are already configured.
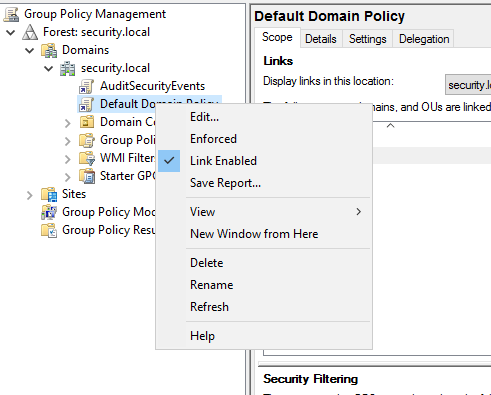
- Edit the Default Domain Policy.
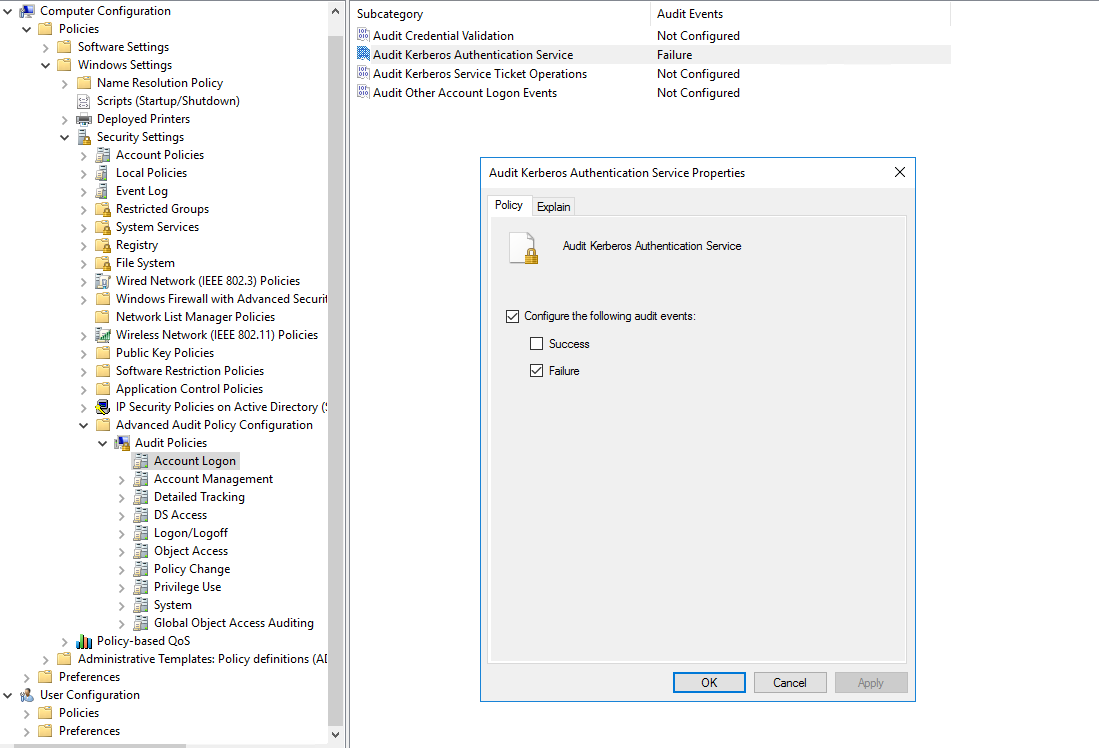
- Navigate to: Computer Configuration -> Policies -> Windows Settings -> Security Settings -> Advanced Audit Policy Configuration -> Audit Policies -> Account Logon -> Audit Kerberos Authentication Services and set to audit Failure events.
Don’t forget to update group policy on the client by running: gpupdate /force
Event Viewer:
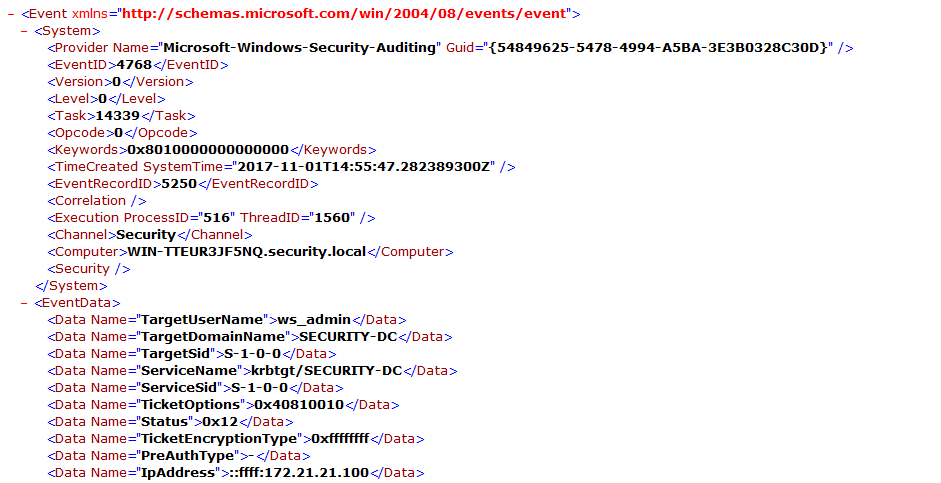
Here is an example of what the event now looks like in Event Viewer.
 ## Task Scheduler:
Configuring the task scheduler took a bit of time. This is due to the way the event was logged. Since it is not the traditional 4625 failed login event, the event trigger based on User did not work. I had to write a custom XML trigger rule to catch the username in this context.
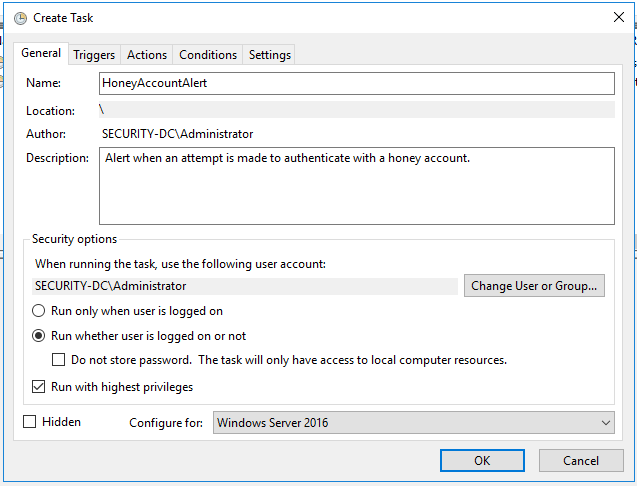
1. Open Task Scheduler and create a new task. Name it whatever you like and make sure to select ‘Run whether user is logged on or not’.
## Task Scheduler:
Configuring the task scheduler took a bit of time. This is due to the way the event was logged. Since it is not the traditional 4625 failed login event, the event trigger based on User did not work. I had to write a custom XML trigger rule to catch the username in this context.
1. Open Task Scheduler and create a new task. Name it whatever you like and make sure to select ‘Run whether user is logged on or not’.
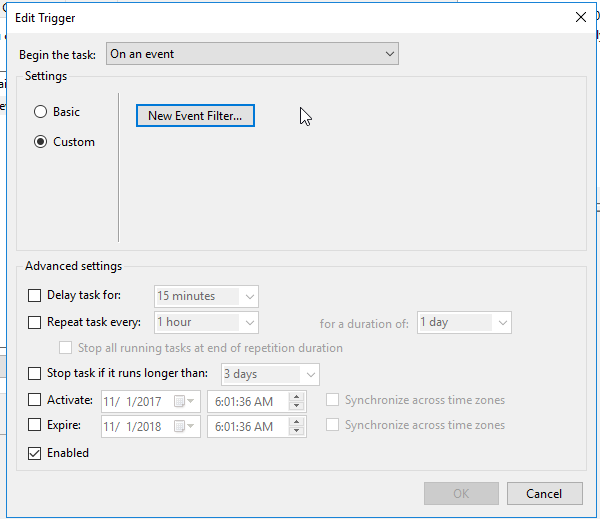
 2. Move to the trigger tab and edit trigger.
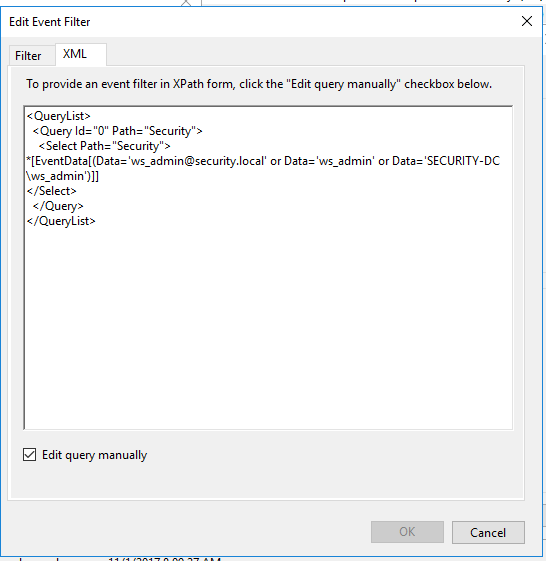
 3. Select New Event Filter and select the XML tab. Check Edit query manually. Modify the following query to fit your user and domain. Since we don’t know what username format the attacker will use, we need some OR statements in there to cover our bases. Typically, we could use the SID but in Event 4678, it is not logged. You can also add granularity and only log on certain events but in this case, I thought it best to alert on any account activity.
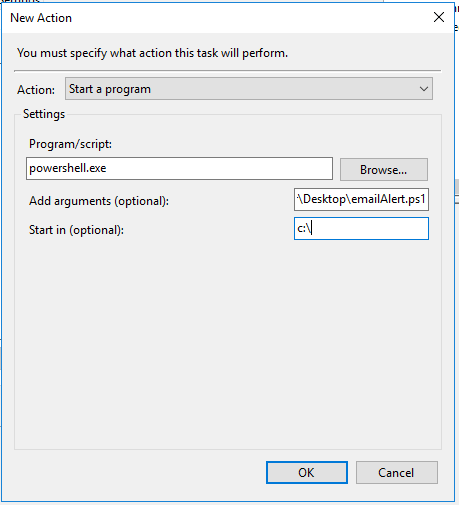
 4. You should be able to save that and move to the Action tab. You can do whatever sort of event here that you like. I chose a powershell script that alerts various people and provides details about the event.
 4. Select Start the task only if computer is on AC power.
function sendMail{

Write-Host "Sending Email"

#SMTP server name

$smtpServer = "smtpserver"

#Creating a Mail object

$msg = new-object Net.Mail.MailMessage

#Creating SMTP server object

$smtp = new-object Net.Mail.SmtpClient($smtpServer)

$file = "C:\users\Administrator\Desktop\alert.txt"

$att = new-object Net.Mail.Attachment($file)

#Email structure

$msg.From = "[email protected]"

$msg.ReplyTo = "[email protected]"

$msg.To.Add("[email protected]")

$msg.To.Add("[email protected]")

$msg.subject = "ALERT:Honey Account"

$msg.body = "Honey Account Activity Detected"

$msg.Attachments.Add($att)

#Sending email

$smtp.Send($msg)


}

function collectDetails{

 $attachment= Get-WinEvent -LogName "Security" -FilterXPath "*[EventData[(Data='[email protected]' or Data='ws_admin' or Data='SECURITY-DC\ws_admin')]]" | Format-List -Property * | Out-File C:\users\Administrator\Desktop\alert.txt

}

#Calling function

collectDetails

sendMail